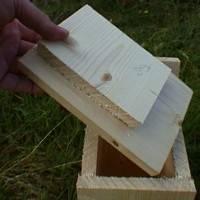
To
construct the nest-box pictured, you need:
- Wood:
I use old floor-boards as they are a perfect size to easily build a
nest-box. Also, they
are relatively cheap and easy to get hold of (and don’t forget
that by using old timber like this you are doing a cool bit of
recycling!) You will
need a plank at idealy 6” (150mm) wide, 1” (25mm) thick and
50” (1250mm) long to construct one nest-box.
- Wood-Glue:
Ordinary PVA (polyvinyl adhesive wood glue) is fine.
However, recently I have been experimenting with some of the
new “tube” glues (e.g. “No More Nails” from Unibond or
"Liquid Nails") which allow you to work much faster. So far, results are promising.
- Galvanised Nails:
These hold the box together and wont rust.
- A piece of metal or
rubber:
This is for making a hinge for the lid.
A good source of rubber is an old bycicle tyre. Alternatively,
you can fix a block of wood to the underside and wedge the lid in
place.
- Silicone Sealant:
For sealing the joins after you’ve finished and ensuring that the
inside stays dry, snug and warm.
Look carefully at the label on the sealant tube to make sure
you buy one without fungicide – Aquarium sealant is your best bet
as this is guaranteed fungicide free.
- Drills:
You’ll need two drill bits, a 10mm
wood drill to add a drainage hole to the base and a 28mm (1
1/8th “) wood drill for the entrance hole. These days, 1 1/8th “ bits are a little hard
to come by, the best you’ll probably find is a 25mm bit – try
it, they sometimes work. Be
aware that a hole larger than 28mm will allow starlings and sparrows
to access the box. The size of entrance hole is crucial: 25mm
– Blue, Coal & Marsh Tits only, 28mm
– Great Tits (& all above), 32mm
– Nuthatches (& all above).
- Miscellaneous:
You will also need a saw, pencil, measuring tape and ideally a
tri-square to ensure that your lines are square.
Nest-box Plan
Fixing a Nest-box:
Fixing
a nest-box is mostly common sense.
- Although they can be
fixed at 6' above ground, I'd recommend fixing above 12' to deter
cats and children from investigating!
The position needs to be protected from both prevailing cold
winds and hot sun (try to fix the box so it faces somewhere in the
arc from north through east to southeast).
- Try to ensure that the
birds have a fairly clear flight path to and from the nest.
If mounting on a tree, be prepared to trim some foliage.
- Mount at an angle to
help exclude rain.
- Don't crowd boxes
together.
More info:
Contact
the RSPB on the web or by post,
enclosing a stamped self addressed A4 envelope and request a copy of of
their leaflet on Nest-boxes (RSPB,
The Lodge, Sandy, Bedfordshire SG19 2DL).
If you want to go crazy and learn to build nest-boxes for
everything from Pippets to Peregrines you need a copy of
BTO Guide No.23 - Nestboxes
by Chris du Feu published by
the British Trust for Ornithology.
Web Links
|